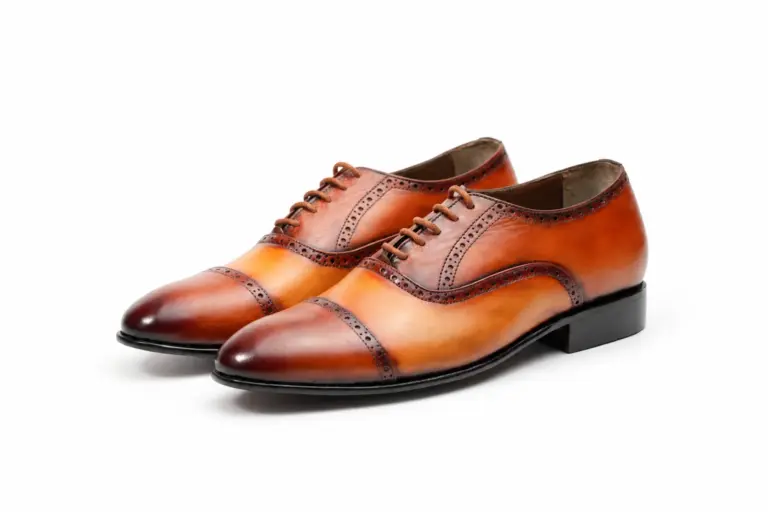
How to Clean and Condition Full-Grain Leather Shoes at Home
A restrained smooth-leather care routine: brush first, clean only when needed, condition lightly, restore color with cream and reserve hard wax for areas that flex less.
To clean and condition leather shoes safely, identify the actual surface, remove loose dirt, clean only as much as needed, allow natural drying and apply a compatible care product in controlled amounts. Full-grain describes preservation of the grain surface; it does not make every finish suitable for the same cleaner or conditioner.
This routine is primarily for smooth finished leather where the maker permits that treatment. Suede, nubuck, patent, oily leather and delicate applied finishes need appropriate instructions. If the material or mark is uncertain, establish what you have before reaching for a strong cleaner. Care should maintain the pair, not create a second problem while trying to remove the first.
1. Identify the leather, finish and actual problem
Full-grain is not a care-product category
A full-grain upper can have different dyes and finishing systems. The term does not tell you whether the surface is transparent-looking, pigmented, oily, glazed or otherwise treated. Read our leather label guide before treating the material badge as permission to use any product labelled leather care.
The Leather Research Laboratory’s finish definitions distinguish transparent aniline, partly pigmented and opaque finishes. Those categories help explain why apparently similar brown shoes can respond differently. The shoe maker’s guidance for the specific pair remains the best starting point for maintenance.
If the listing does not identify the surface, ask the seller. A clear photograph may help the conversation but cannot reliably reveal the full specification. Do not assume the most favourable or familiar finish. Record what is known before applying a product that could alter colour or sheen.
Classify the care need
Loose dust, ordinary surface dirt, excess polish, a water mark and a damaged finish are different problems. Start with the least invasive appropriate step. Dry brushing may resolve dust without any liquid cleaner. A deep cut will not be repaired by conditioner, and an unknown stain should not receive several experimental products in succession.
Photograph an unusual mark before treatment and note when it appeared. Include the product history and any exposure to water or another substance. This gives a maker or repairer useful evidence if advice is needed. A close-up taken after repeated scrubbing can make the original cause harder to assess.
| Need | Starting response | Avoid assuming |
|---|---|---|
| Loose dust | Appropriate soft brushing | A deep cleaner is required |
| Ordinary dirt | Finish-compatible cleaning guidance | All leather tolerates the same liquid |
| Colour loss | Identify finish and assess suitable colour work | Conditioner alone restores pigment |
| Water or salt marks | Specific assessment and care advice | More polish hides the cause |
| Cracks, cuts or peeling | Maker or repairer assessment | Routine conditioning repairs structure |
Prepare a modest set of tools
Useful basics include a suitable soft brush, clean cloths, a protected work surface and the approved care product. Separate cloths can prevent colour transfer between pairs. Remove laces where practical so that you can work around the tongue and eyelets without coating the laces unintentionally.
You do not need every available jar before starting. Cleaner, conditioner, colour cream and wax have different roles, explained in our care-product comparison. Choose only the treatment relevant to the observed need and the material.
2. Remove loose dirt and clean conservatively
Begin dry
Let loose mud or damp dirt reach a condition appropriate for gentle removal according to the maker’s instructions. Use the suitable brush without grinding grit into the surface. Work around seams and the sole perimeter carefully. The objective is to remove debris, not to abrade the finish until every irregularity disappears.
Inspect after brushing. If the surface is already clean enough, there may be no need for a liquid cleaning stage. Repeated deep cleaning after every wear can be unnecessary. A good routine responds to condition rather than following an obligation to use all products in a fixed sequence.
Check the brush itself. A brush loaded with a different colour polish can transfer product. Use appropriate separate tools where needed and keep them clean enough for the task. The same caution applies to cloths used on strongly coloured or hand-finished shoes.
Test unfamiliar products
Read the product’s intended materials and application instructions. A broad product name does not override the shoe maker’s restrictions. Where practical, test a small concealed area, allow it to settle and inspect under useful light. Neutral formulas can still change colour depth or sheen.
Saphir’s Crème Delicate guidance provides an example of product-specific application and material advice. Use such instructions for the specified product rather than converting them into a universal recipe for all full-grain shoes. Formulations and intended uses differ.
Do not test immediately before an important event with no time to assess the result. Allow for the product’s specified drying and inspection. If the test changes the finish in a way you dislike, stop rather than treating the entire pair in the hope that uniformity makes the change acceptable.
Clean only as required
Follow the approved method with controlled amounts and gentle pressure. Avoid saturating the assembly. The shoe contains lining, reinforcement, adhesives and bottom components as well as the outer leather. A cleaning approach suitable to a loose material sample may not be suitable to the completed pair.
Do not scrub an unfamiliar stain aggressively. Strong solvents and stripping products are specialist interventions, not routine household shortcuts. If ordinary compatible cleaning does not resolve the problem, identify the next step before escalating. Repeatedly changing products can obscure the cause and alter the finish further.
3. Dry naturally and condition only when appropriate
Give the shoe time to settle
Allow cleaned or damp shoes to dry naturally in suitable conditions, following maker guidance. Avoid a radiator, hairdryer or direct flame. Do not rush from a wet cleaning stage into another treatment because the exterior appears superficially dry. The assembly can retain moisture beyond the visible surface.
Suitable shoe trees can support shape while the pair rests, but should not force the upper outward. If the shoe is substantially wet, follow the maker’s drying instructions for that situation. Our wet-shoe guide distinguishes recovery after exposure from ordinary maintenance.
Inspect the dry result before deciding what comes next. A darker patch immediately after cleaning may look different once the surface has settled. Applying several treatments without observation makes it harder to understand which step changed the appearance.
Conditioning is not saturation
If the maker recommends conditioning and the pair needs it, use a compatible formula in controlled amounts. Follow the product instructions rather than inventing a universal quantity. The objective is appropriate maintenance, not making the upper as oily or dark as possible.
Heavy treatment can change colour and feel. A conditioner is not a guaranteed cure for cracking or a sizing tool for tight shoes. Structural damage and unsuitable fit need separate assessment. Read our break-in guide before using care products to justify painful footwear.
Oily and waxy leathers may require their own routine. Pull-up leather explained describes why local colour changes can occur through movement of oils and waxes. Do not automatically add more product whenever a lighter area appears on such a leather.
Avoid rigid calendars
There is no universal conditioning schedule that suits every finish and use pattern. An occasional formal pair and a frequently worn casual pair experience different conditions. Follow maker advice, observe the material and keep a brief record of products used. That is more useful than treating every shoe every week regardless of need.
If you cannot tell whether the material needs treatment, ask for guidance with photographs and use history. More care is not automatically better care. A restrained routine makes changes easier to monitor and reduces the chance of unnecessary buildup.
4. Use cream and wax for their intended roles
Colour cream is a deliberate choice
A suitable pigmented cream can help maintain colour where the finish permits it. Choose the intended shade carefully and test when uncertain. A jar that matches a dark toe may not match a lighter vamp. For a layered applied finish, ask the maker how to preserve the original contrasts.
Our hand-dyed versus factory-finished guide explains why colour processes need their own maintenance discussion. Heavy uniform pigment can obscure a treatment whose appeal depends on variation. Neutral products can also change appearance, so they do not remove the need for assessment.
If the objective is substantial recolouring, consult a specialist. Restoring the original finish and choosing a new colour are different requests. Explain which you want and ask about feasibility and limitations before applying a product intended for more extensive colour work.
Wax and shine
Wax can affect surface protection and presentation according to its formulation, but it is not interchangeable with cleaner or conditioner. Use it where the maker and product guidance support it. A highly reflective toe is a particular aesthetic choice, not a maintenance requirement for every leather shoe.
Areas that flex repeatedly behave differently from a more structured toe. Thick hard-wax buildup across the vamp can produce an appearance you did not intend. Apply controlled amounts and observe the result rather than trying to achieve every finish in one heavy coat.
For grain leather, product can collect in recesses. Brush appropriately and avoid deposits intended to hide every small mark. Our surface texture guide discusses the difference. A textured upper still needs care matched to its finish.
Finish the pair and inspect it
Allow the specified drying time, then brush or buff as instructed. Compare both shoes under similar light. Replace clean dry laces once the work is complete. If one area looks unexpectedly different, do not immediately layer on another product; establish whether it is residue, colour change or an unresolved mark.
Keep the care record simple: product, date and any observed change. This is useful when you later seek advice or maintain a finish you particularly value. It also prevents unnecessary repeated treatment because you cannot remember what was applied.
Where to go next: This is the core smooth-leather care routine. Use How Often Should You Condition and Polish Leather Shoes? for timing, Cream vs Wax vs Conditioner for product roles, and the Leather Knowledge Hub when the upper is suede, nubuck, patent, pull-up or another finish.
5. Know which situations need a different routine
A care session does not need every stage
For a lightly dusty pair whose finish remains sound, a session may consist only of appropriate brushing and inspection. That is still maintenance. Skipping unnecessary liquid cleaning is not neglect when no dirt or product buildup requires it. The observed condition should determine whether a further stage has a purpose.
For a more visibly dirty pair, follow the approved cleaner’s method, then inspect the dry result before deciding on conditioner or colour cream. If the surface is clean and the maker does not recommend another treatment, you need not add one to complete an imagined checklist. This keeps the routine easier to monitor.
For a carefully patinated pair, establish your objective before treatment: preserving the original variation, blending a minor colour loss or commissioning a broader refresh. Those goals require different decisions. A generic brown cream can be appropriate for one objective and counterproductive for another.
If you are maintaining several pairs, label or separate tools where colour transfer is possible. Work on one pair at a time and check product suitability independently. The fact that a formula worked on yesterday’s brown shoes does not establish that today’s burgundy or oily leather has the same finish.
A successful session leaves the shoes appropriately clean and maintained for their specification. It does not require maximum shine or a darker colour as evidence that the work was worthwhile.
Suede, nubuck and special finishes
Suede and nubuck have napped surfaces and need suitable methods. Do not apply a smooth-leather cream merely because the material is genuine leather. Read suede versus nubuck and suede cleaning for those topics. Patent and other special surfaces also require their own guidance.
Rough-out leather with a particular wax treatment may differ from ordinary dress suede. A product recommended for one maker’s rough-out article should not automatically be used on another napped shoe. Establish the actual finish instead of transferring a routine through visual similarity.
Water, salt and unidentified contamination
If shoes have significant water exposure or a salt-like deposit, obtain appropriate instructions for the material and mark. Do not bury residue beneath polish or repeatedly soak the pair. The surface symptom and the underlying cause need to be considered separately.
Suspected mould, an unidentified chemical stain or a widespread finish change deserves specific assessment. Protect the pair from further unsuitable treatment and provide photographs and history. A generic article cannot diagnose every deposit from its colour alone.
When to stop home treatment
Stop if a compatible test causes unwanted change, cleaning exposes damage or the problem remains unidentified. Cuts, splitting, peeling and loose seams are not routine conditioning tasks. A maker or qualified repairer may offer an appropriate intervention, but its outcome depends on the actual condition.
For everyday maintenance, return to the measured sequence: identify the surface, remove loose dirt, clean only as needed, dry naturally and use compatible products in controlled amounts. Preserve the finish you bought rather than trying to improve it through unnecessary aggression. Good care is appropriate care for a particular pair.